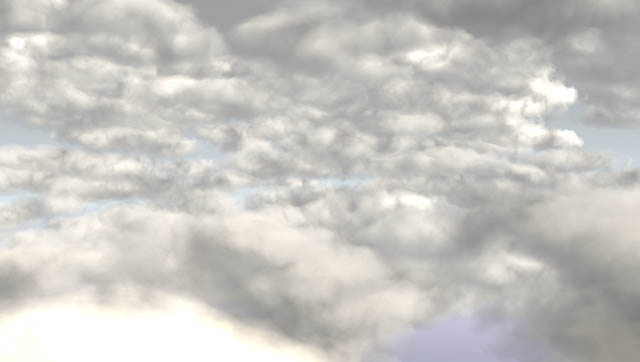
This tutorial will show You how to make a cloudy sky, on a low budget and without using any plugins, which could even be called 'volumetric' to a certain extent. The clouds are affected by lightsources and cast shadows. It won't produce an effect that can be flown through without side-effects, but doing a fly-by is somewhat possible.
I won't deal with the various values in this tutorial, as they will differ from scene to scene (especially with regards to the size of the scene). It takes patience combined with trial and error to find the values that get You the effect You're looking for. But to start out with, I have included the example scene.As a base object we use a geosphere, which has been scaled in height by using a Xform modifier, so that it is formed into a discus shape.
In my example scene I have used three particle systems (PCloud). One for the lower and another for the upper clouds. The third particle system is placed in the background and is higher than the other two, so that that scene's background is nicely filled with clouds.
All three particle sysems use the earlier created geosphere (instanced geometry) as the particle type.In addition I have put a cylinder around the entire scene, flipped its normals, and mapped a blue gradient to it. The result should look like a horizon. A spotlight placed far away will provide for light from the sun (the cylinder is excluded from casting shadows). I have reduced the shadow density to 0.5, to prevent the clouds from disappearing in total blackness.
Now to the most important part: The material. The bumpmap consists of a noise (turbulence) texture with 8 levels and a size of 35. The more levels You use, the more detail the clouds will have. The values portrayed here reflect those used in the example scene. When You create Your own clouds, it is well possible that You will need to play around a bit with the size parameter. Depending on the size of the clouds and their structure (wispy or compact), the values You use can differ vastly from those used in the example scene. Lastly, I have inverted the texture, to cause the bumps to become dents.
The bumpmap is then copied into the diffuse map slot, and the invert option unchecked. All other values remain the same, exchept for the "high" threshold, which is set to 0.3. This results in a more defined effet in the color of the clouds. This effect causes "pseudo-shadows" inside the cloud, making the sense of depth more believableIn addition, You should set both the bump and the diffuse map to world coordinates. This will cause the clouds to move and change shape as they glide through the 33D texture when they are animated.
Now on to the most important texture, the opacity map. I have used the 'gradient' map type. The gradient starts with black and blends into white in the end. I have used the 'Pong' gradient style (important!). This causes each partickle, no matter from which point of view it is being rendered, to fade out to the sides. You can also obtain this effect using the Falloff texture map (under more Parameters). However this would cause the edges of the geosphere particles to show up, which causes not-so-pretty bubble-clouds (especially when You look alongside a cloud using this effect).
Because You can use multiple coor changes in the gradient map type, one can change it so that the geospheres are up to 100% transparent along their edges.
last but not least, I have changed the shininess strength and shininess values to 0, so that there won't be any highlights on the clouds.
To finish the scene off I have added a fog effect, to give the whole a bit more of an atmospheric effect. I admit: due to the transparencies the rendertime will shoot upwards, but when compared to volumetric plugins it's not much worse (and a lot cheaper).
Download the example scene + avi + jpeg + tutorial (German version).